Case:
We receive new sets of documents every day that need to be printed by the next day, and we would like FolderMill to print them after most employees have left the office. Is there a way to schedule printing, so that FolderMill can automatically start and stop at a certain time? For instance, we would like FolderMill to start at the end of the workday and stop processing files in the morning, just before work hours begin.
Solution:
You can start and stop FolderMill's operation at any time. Simply schedule the program's operation using the Task Scheduler, which is available by default in any Windows system. Follow our step-by-step guide to plan the time for scheduled printing or conversion of documents. Alternatively, you can use the command line to start/stop FolderMill processing.
With Windows Task Scheduler:
From the command line:

To set things up as described in this use case, you will need to have administrator rights.
How to schedule running FolderMill as service
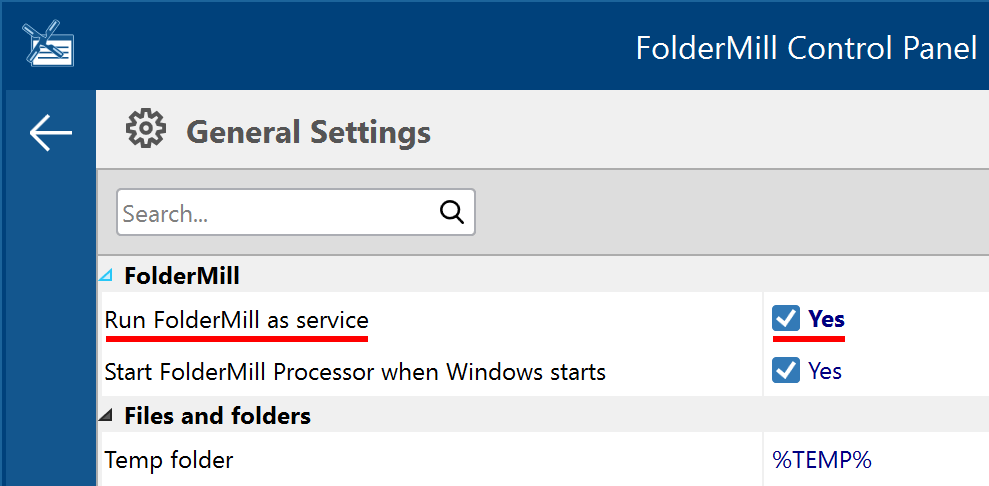
To use this method, you must have the full-featured version of FolderMill running in service mode. To enable it, open FolderMill Settings and make sure that the setting Run FolderMill as service is enabled.
Start
- Create the necessary Hot Folders and Actions;
- Open Task Scheduler. You can quickly find Task Scheduler if you press the Windows Start / Windows key button and start typing "task scheduler":

- Click on the Task Scheduler Library folder and create a new task (Action → Create task…):

- Input a name for the new task, e.g., "Run FolderMill". Besides, we recommend enabling these options:
- Run whether user is logged on or not
- Run with highest privileges
You may be prompted to enter the Administrator's password. If you are not the Administrator, you can try to do without these options, for example, if your PC is running all the time and doesn't go to sleep mode.
Go to the Actions pane and enter this command which will make FolderMill service start:
sc start FolderMillService
And click OK.
- Now specify the triggers to define when FolderMill should start. Go to the Triggers pane and add a new trigger by clicking New:

- Set a time-based or event-based trigger. You can specify the exact time and make the task recurrent by defining time intervals: daily, weekly, monthly or even certain days of the week. Event-based triggers allow you to start FolderMill at a specific event, e.g., at user log on. You can add multiple triggers, if necessary.

Let's set the time trigger to Daily, 18:00 and click "OK".
Stop
Now let's create a task which would stop FolderMill. Just follow the same steps as above but this time enter the "stopping" command:
sc stop FolderMillService
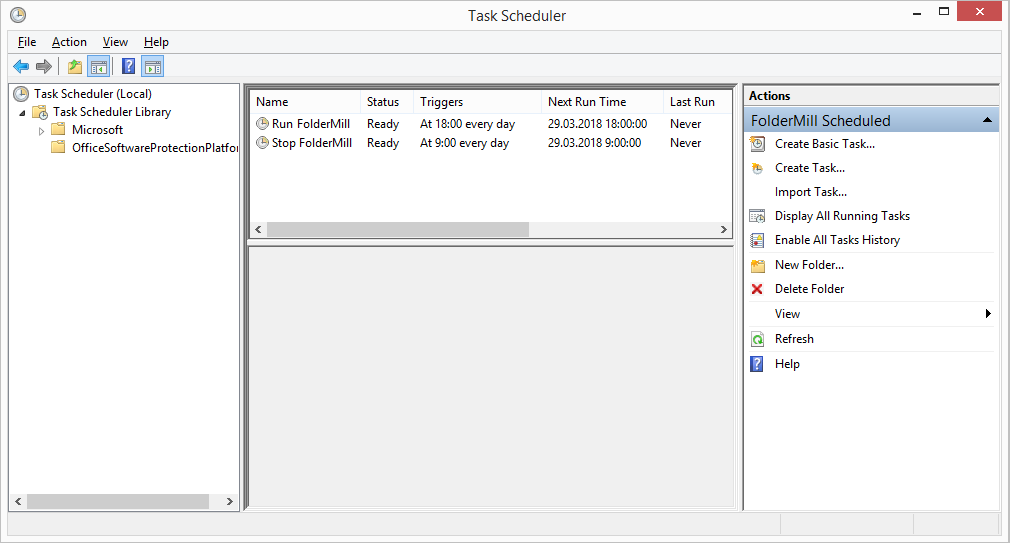
Don't forget to set the right time or condition for the time/event trigger. As a result, you should have something like this:
Now FolderMill service is configured so that it starts real-time processing of files at 6 PM and stops working at 9 AM every day.
Checking that everything works fine
To ensure that everything is set up correctly, you can run a test in advance. First, open the FolderMill Control Panel (make sure that FolderMill processing is stopped). Next, switch to the Task Scheduler and select the sc start FolderMillService action. Then, click "Run" on the right menu of Task Scheduler to perform a test run. You will see the task running: FolderMill's windmill will start rotating, and the status will change to "FolderMill is running" on the program's Control Panel. Likewise, the sc stop FolderMill service should stop the windmill rotation. That would mean that everything is set up correctly.
How to schedule running FolderMill as application
FolderMill can also work as a regular desktop application. Take the same steps as described above but select FolderMill Processor.exe to start or stop.
Start
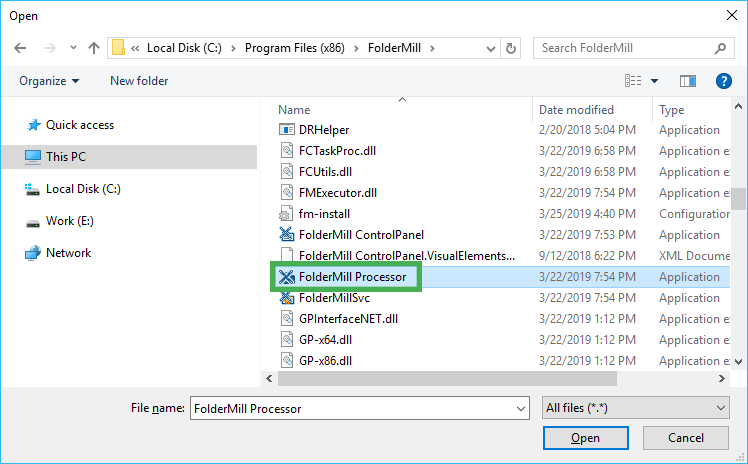
When creating a new action in the Windows Task Scheduler, click Browse…, go to FolderMill installation folder and select FolderMill Processor:
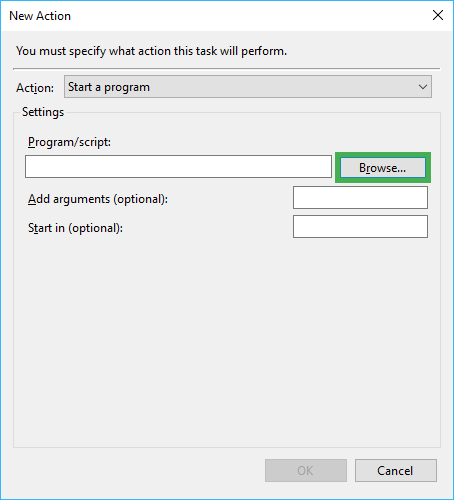
Now that you have configured Windows Task Scheduler to start FolderMill Processor at a specific time, refer to the next section to learn how to stop the Processor.
Stop
To schedule an action which would stop real-time file processing, add a -shutdown attribute:
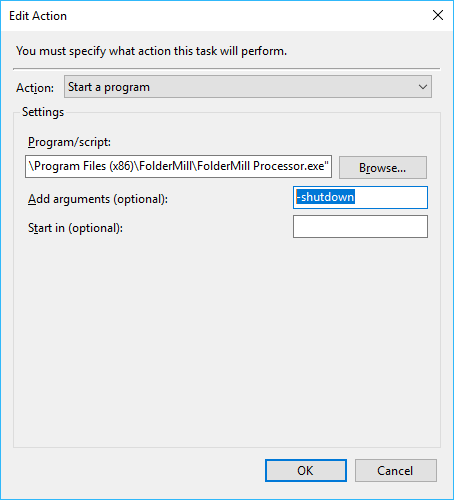
Congratulations! Now have FolderMill application set up to start and stop its work at a selected time.
How to start/stop FolderMill or copy files via command line
Another option is to control FolderMill's operation using the command line, which can be useful, for example, if you use a command line tool or scripts. Use the CMD commands listed below.
Start/stop as service
Start
sc start FolderMillService
Stop
sc stop FolderMillService
Start/stop as application
Start
"C:\Program Files (x86)\FolderMill\FolderMill Processor.exe" -desktop
Stop
"C:\Program Files (x86)\FolderMill\FolderMill Processor.exe" -shutdown
Pause/unpause a selected Hot Folder
You also have the option to pause or unpause a specific Hot Folder, thereby making it inactive or active.
Pause
"C:\Program Files (x86)\FolderMill\FolderMill ControlPanel.exe" -pause_rule "<Hot Folder name>"
Unpause
"C:\Program Files (x86)\FolderMill\FolderMill ControlPanel.exe" -unpause_rule "<Hot Folder name>"
In the examples above, the default path to the folder where FolderMill is installed is specified. Correct the lines accordingly if you have a different path.
Сopy files to a Hot Folder via command line
Another approach is to keep FolderMill running continuously and copy files to a Hot Folder when needed. To schedule the copying of necessary files to a Hot Folder, use the Task Scheduler again. This makes things more flexible as FolderMill can continue running uninterrupted without being stopped.
- Create or choose a folder where your files will be accumulated for processing (e.g., C:\Input)
- Add a task using this sample command in the Task Scheduler:
cmd /c move /y "C:\Input\*" "C:\FolderMill Data\Hot Folders\1\Incoming\"
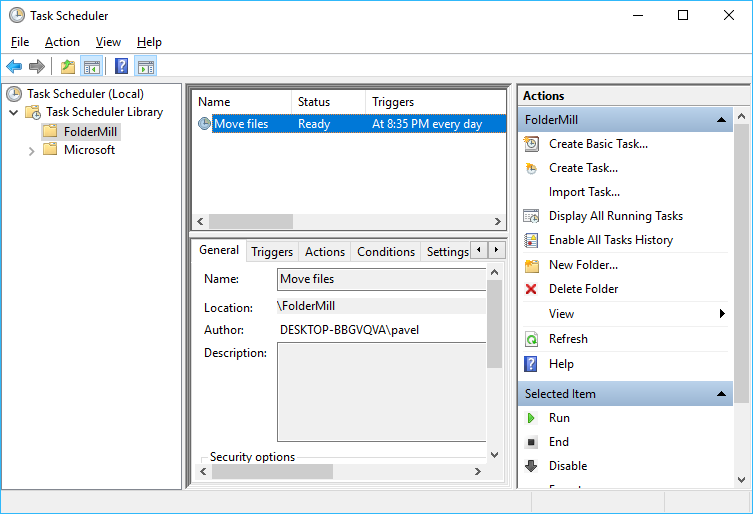
This command will move all files appearing in C:\Input to the FolderMill's Incoming folder. Just set it to launch at the right time – using a time-based or event-based trigger (as described above).
FolderMill combined with Windows Task Scheduler gives you many options to set up timing for your files processing and scheduled printing. If something doesn't work for you, please contact us, and we will find a solution for you.
